This shader experiment was created as part of my bachelor's thesis, where my team and I chose to replicate the look of claymation within 3D physics-based environments. The following WebGl demo is a simple 3D viewer with 3 models (a character, an object, and an animated model). You can rotate the model and change the clay settings to view effects of the clay shader on 3D models.
In this demo, there are 4 main features you can change about the clay: the clay's bumpiness, the fingerprints on the clay, the clay's flattenings, and the clay folds.
Bumpiness is affected by amount and size (how prominent/spiky the bumps could look). The shape option is there to view different variations of the same combination of bump amount and size.
The other features have settings for visibility and texture size. You can click on the randomize position/rotation buttons to change how the textures are placed on the models.
We experimented and emulated the clay look with an interest to popularize this artistic animation style in gaming and make the style more accessible to developers without experience with claymation productions. If you are interested in how it works and not read the thesis, below is a brief explaination of our approach and some snippets of our process.
Clay has four observable characteristics: bumpiness, folds, fingerprints, and flattening. Bumpiness defines the overall shape of the object, while the other three function more as surface textures. Although some pronounced folds and flattenings can also influence the shape, our thesis constraints prevent us from exploring those details. Additionally, because clay objects vary due to hand modeling, the clay look should be generated procedurally rather than baked into a 3D mesh. In game rendering, this can be achieved by using vertex shaders to alter the shape and fragment shaders to modify the textures.
To create the bumpiness, we deformed the mesh geometry in the vertex shader by multiplying each vertex's position with a Perlin noise texture (with values ranging from 0.0 to 1.0). The deformation occurs relative to the mesh’s pivot point. To prevent the mesh from appearing spiky or pinched at the center, we remapped the Perlin texture to a 0.95 to 1.0 range. Additionally, we used vertex colors as an extra control, where darker vertices deform less. This allows us to control where the deformation happens— for example, we painted the sharp edges and corners of shelves dark grey to maintain a box-like shape. Finally, we recalculated the mesh’s normals after the deformation to ensure proper shadow rendering.
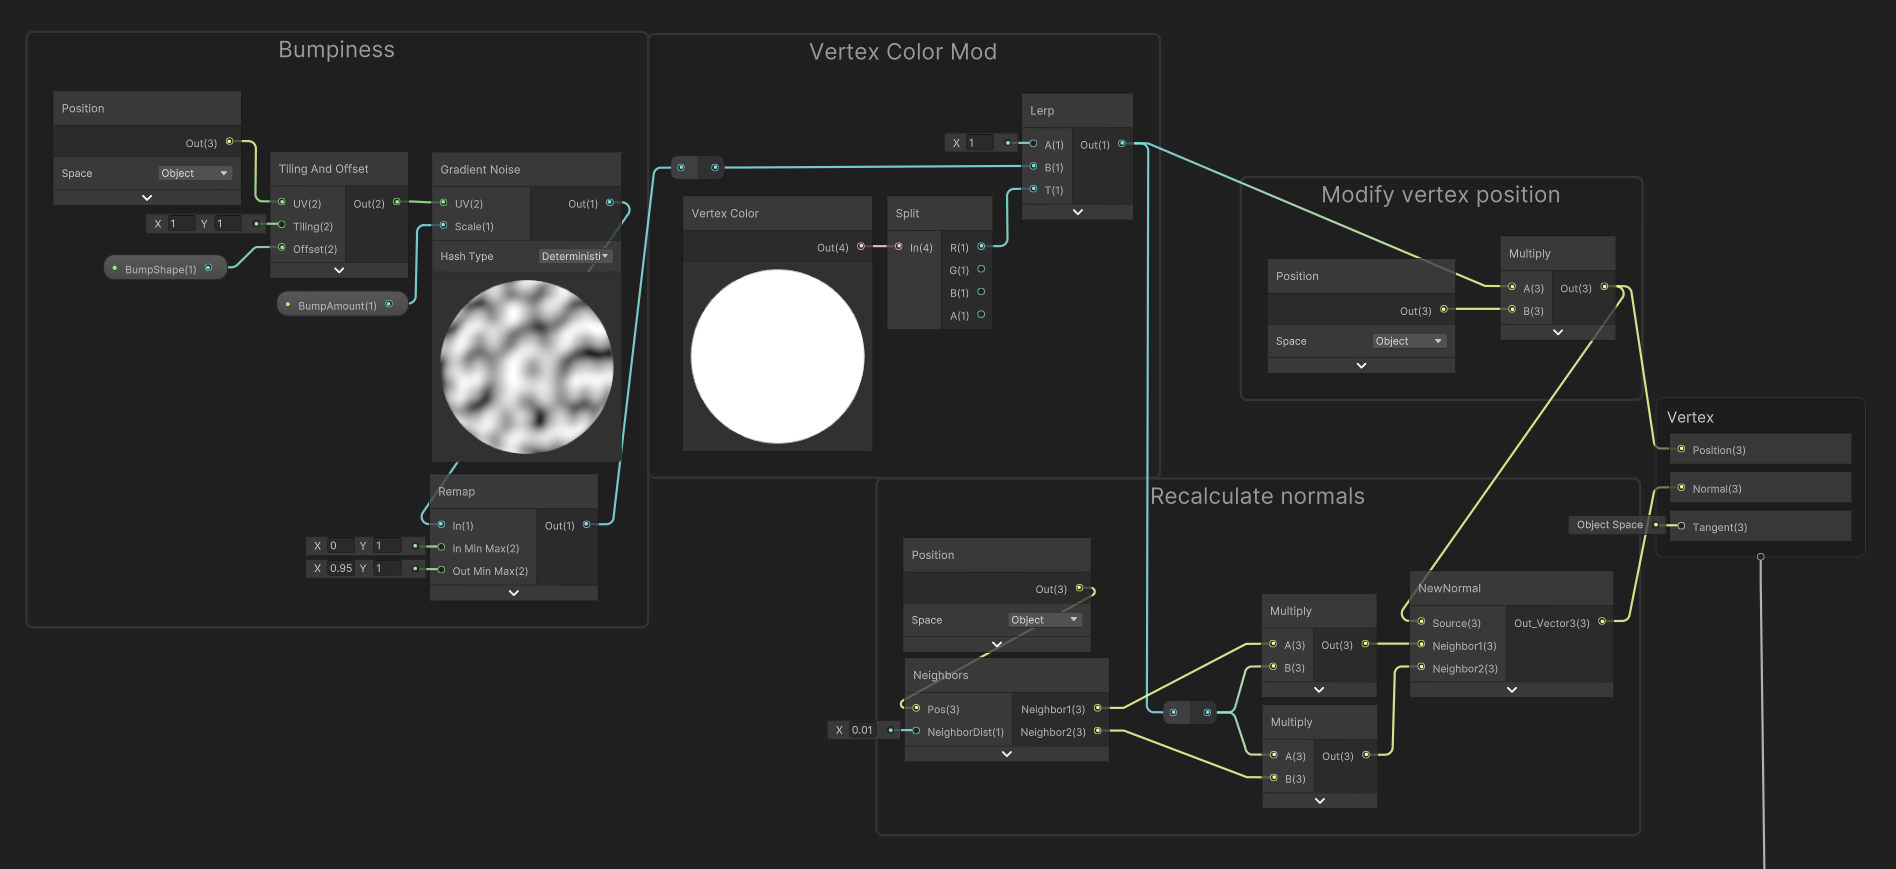
The clay bumpiness vertex shader
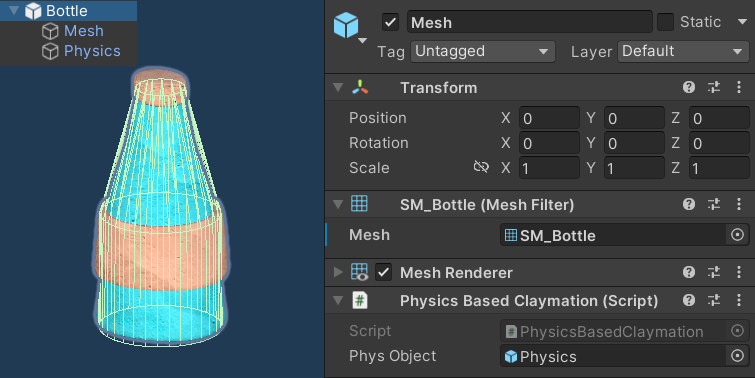
Affect of the vertex shader on a mesh
However, the bumpiness of the surface depends on the mesh’s geometry since the deformation affects each vertex individually. So, for the vertex shader to be effective, the mesh has to have a high vertex count with evenly spaced vertices. When working with this clay look, we had to find a balance between maintaining game performance and achieving the desired clay look. In Checkout Showdown, we save the geometry count for smaller objects and those not viewed from multiple angles.
In the fragment department, we adjust the clay textures (fingerprints, flats, and folds), create their normals, and combine them to produce the final clay look. First, we begin by modifying black-and-white images to control the texture's position, rotation, and visibility on the model. These images are randomly adjusted at runtime to simulate a handmade appearance. Then, we create normal maps for each texture feature using Unity’s built-in tool, allowing us to tweak depth and shadow intensity, and combine them all. Additionally, because flattening does not appear on a fold, we used a masking technique (hand-drawn or generated using a Voronoi texture), where black pixels hide parts of the flattening texture and white pixels reveal it.
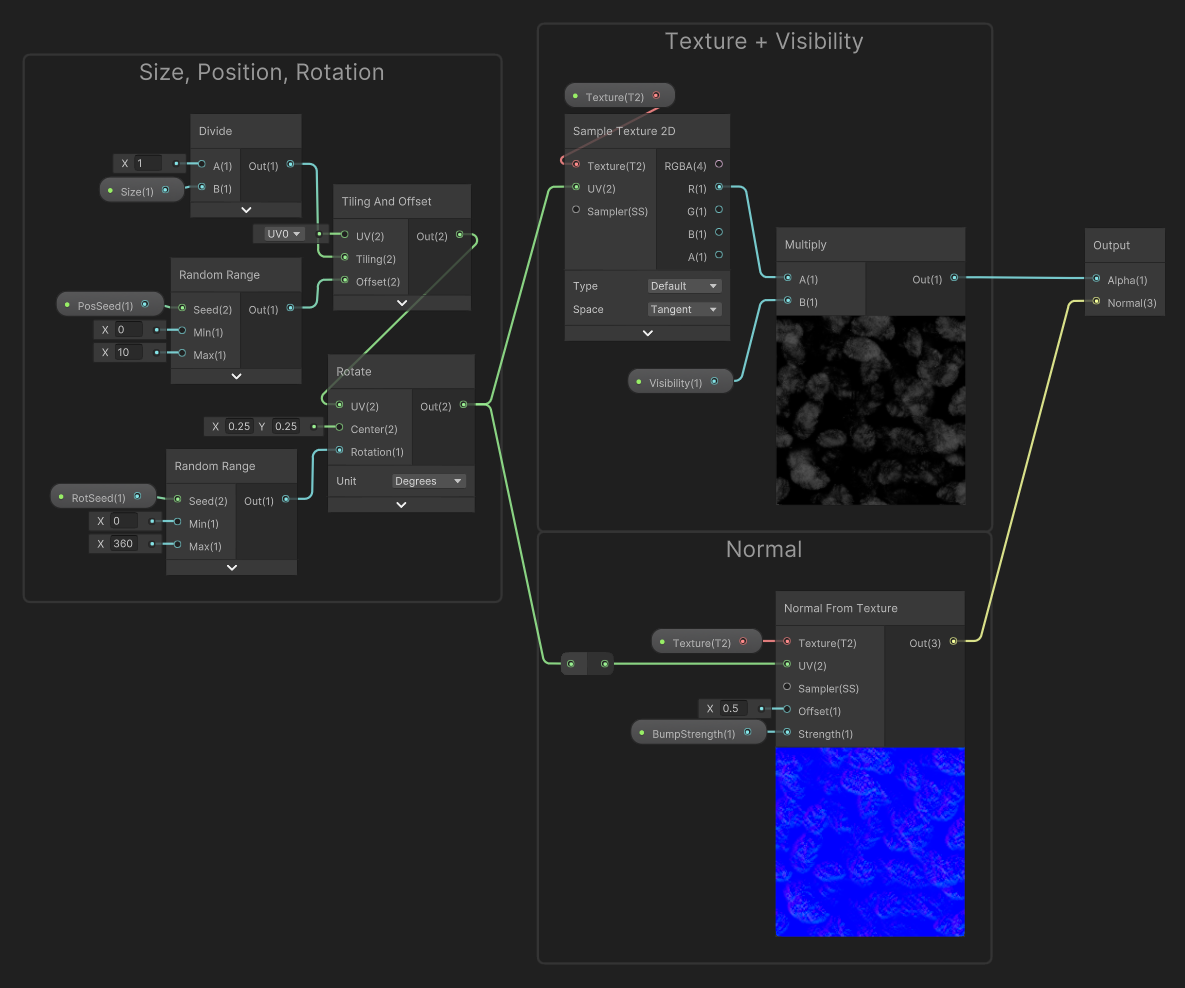
Generic shader function for clay textures
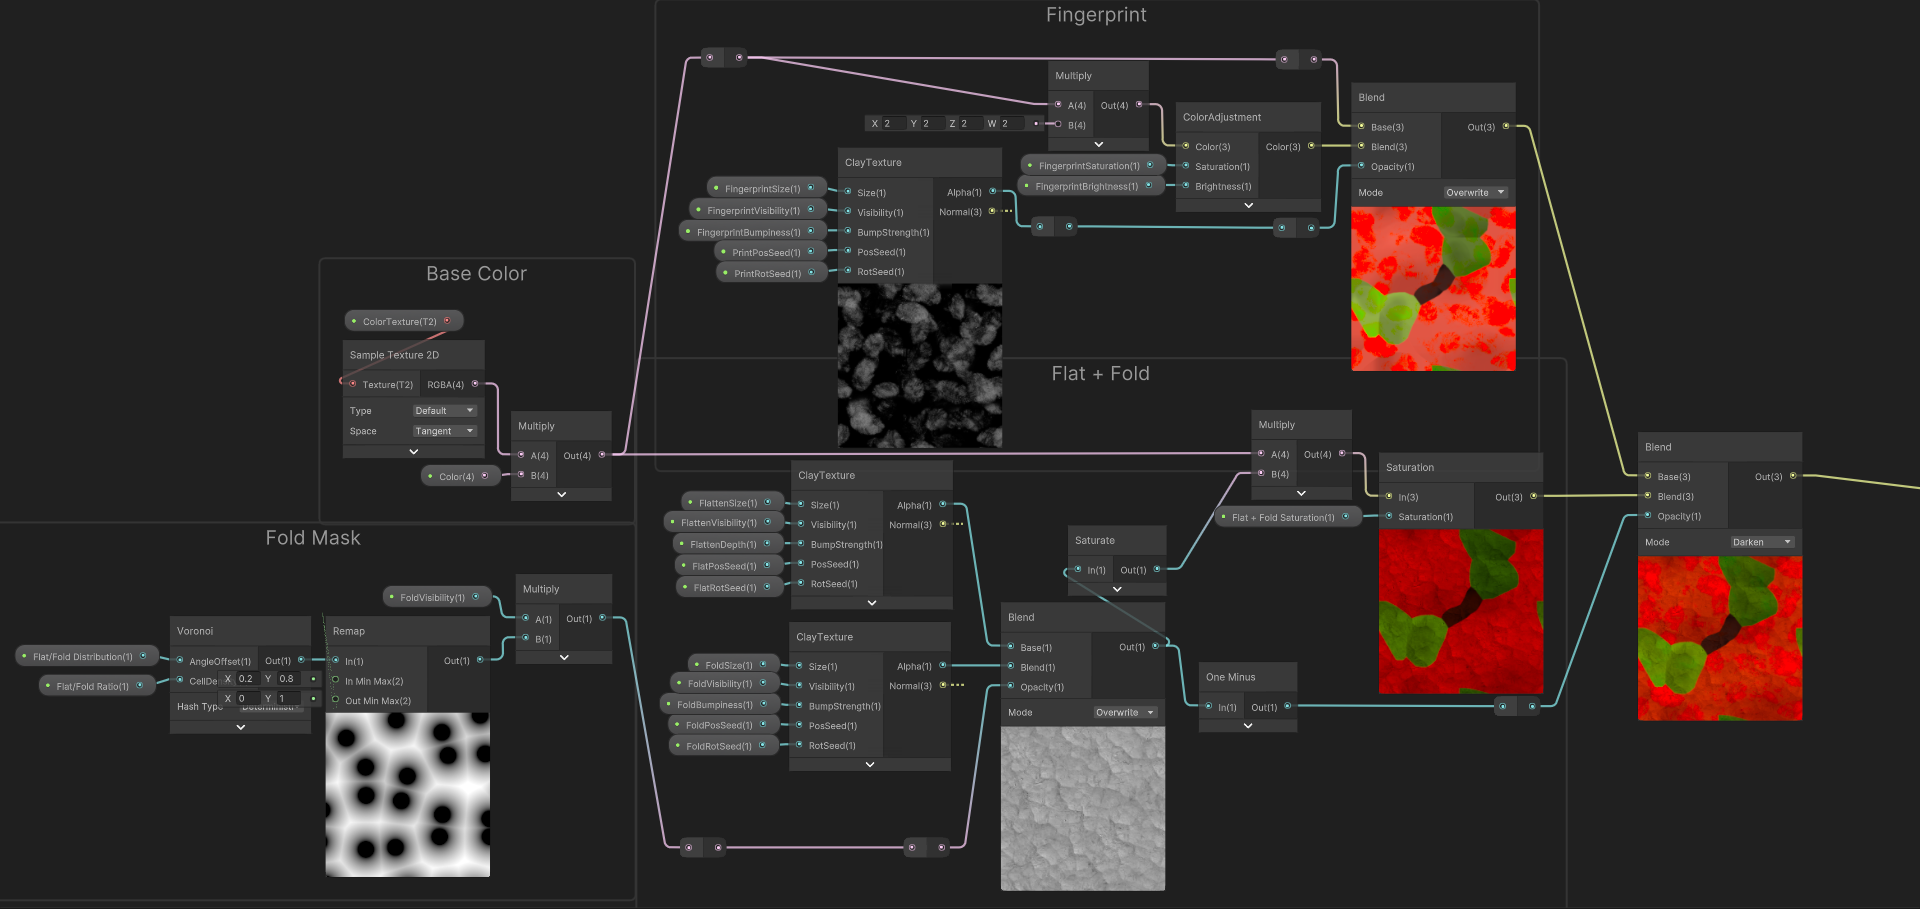
How the fragment shader combines textures and outputs the material's color
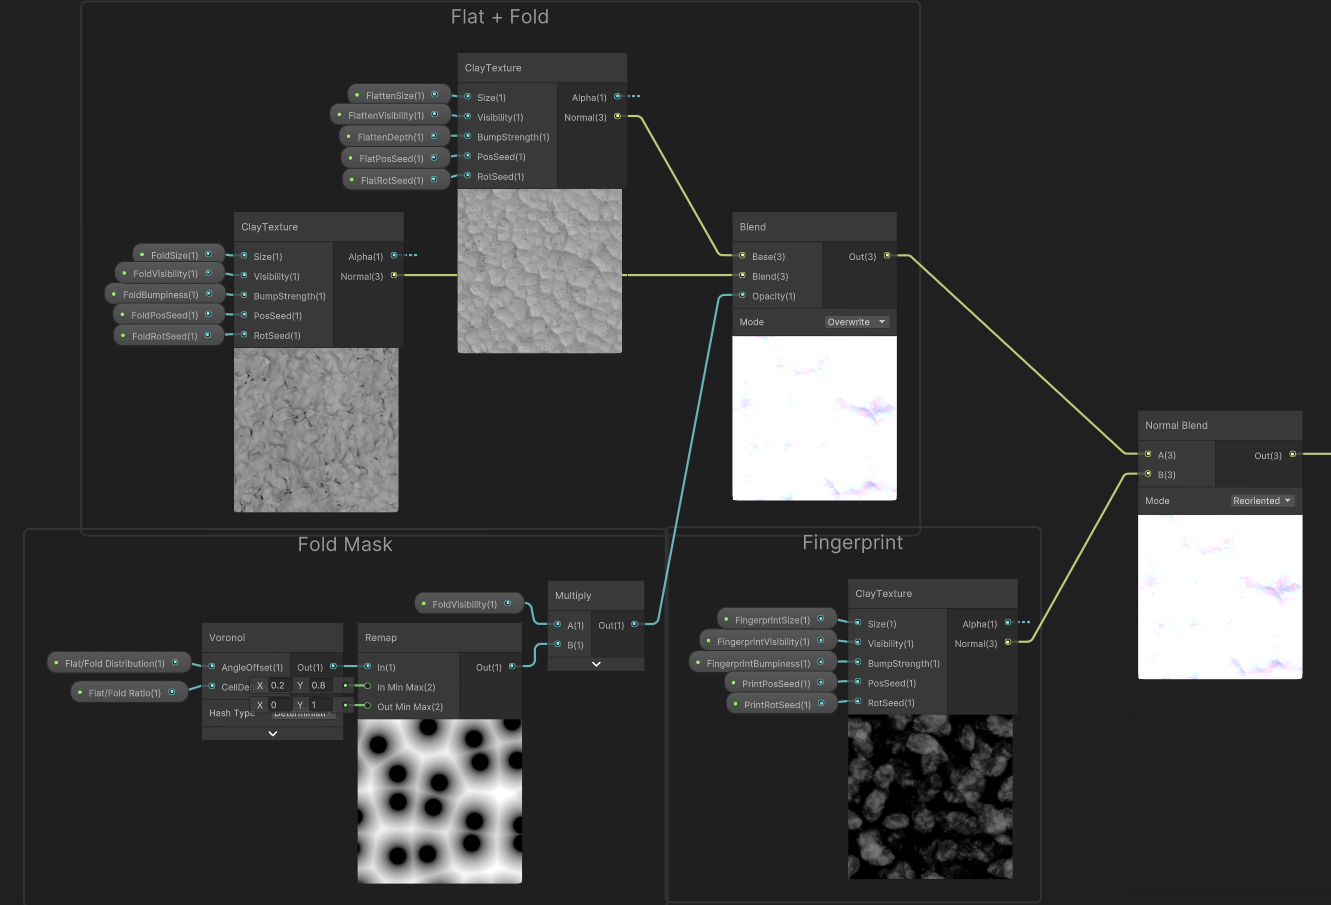
How the fragment shader combines texture normals and outputs the material's normal
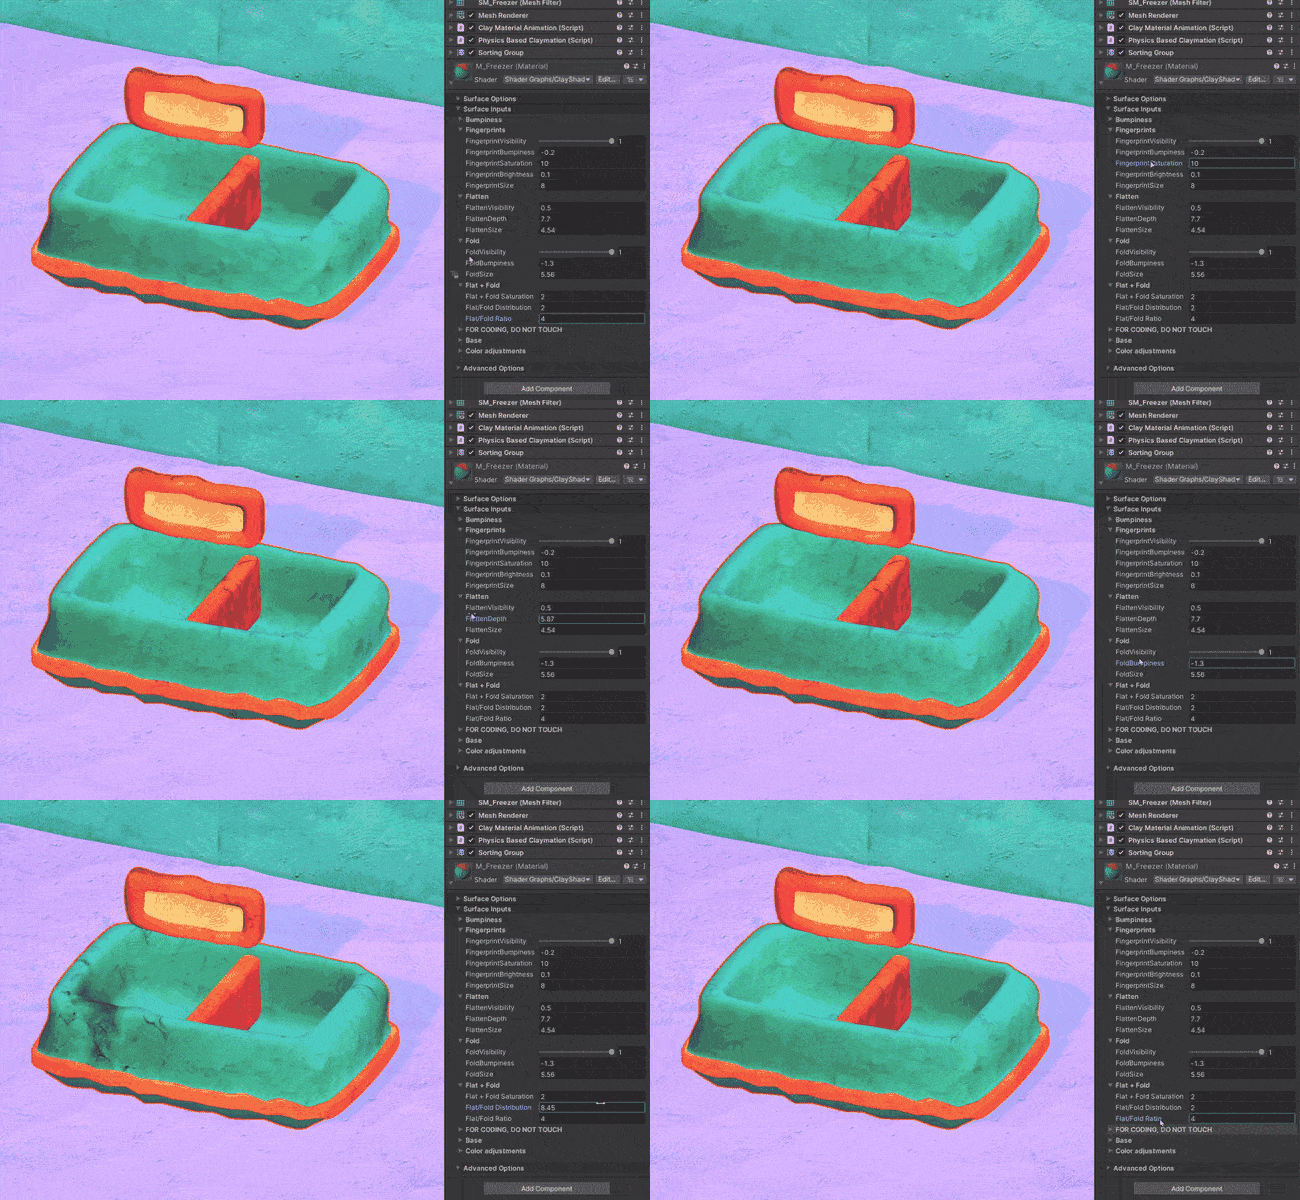
Affect of the vertex shader on a mesh